
Why do you need a travel router? If you’ve ever found yourself struggling with unreliable or insecure hotel Wi-Fi, a travel router like the GL.iNet Beryl AX is an essential gadget for your travels. In this post, I’ll walk you through why a travel router is a must-have device for your journeys and provide a detailed, step-by-step setup guide for initial setup of the GL.iNet Beryl AX (also works for the other GL.iNet travel router models)
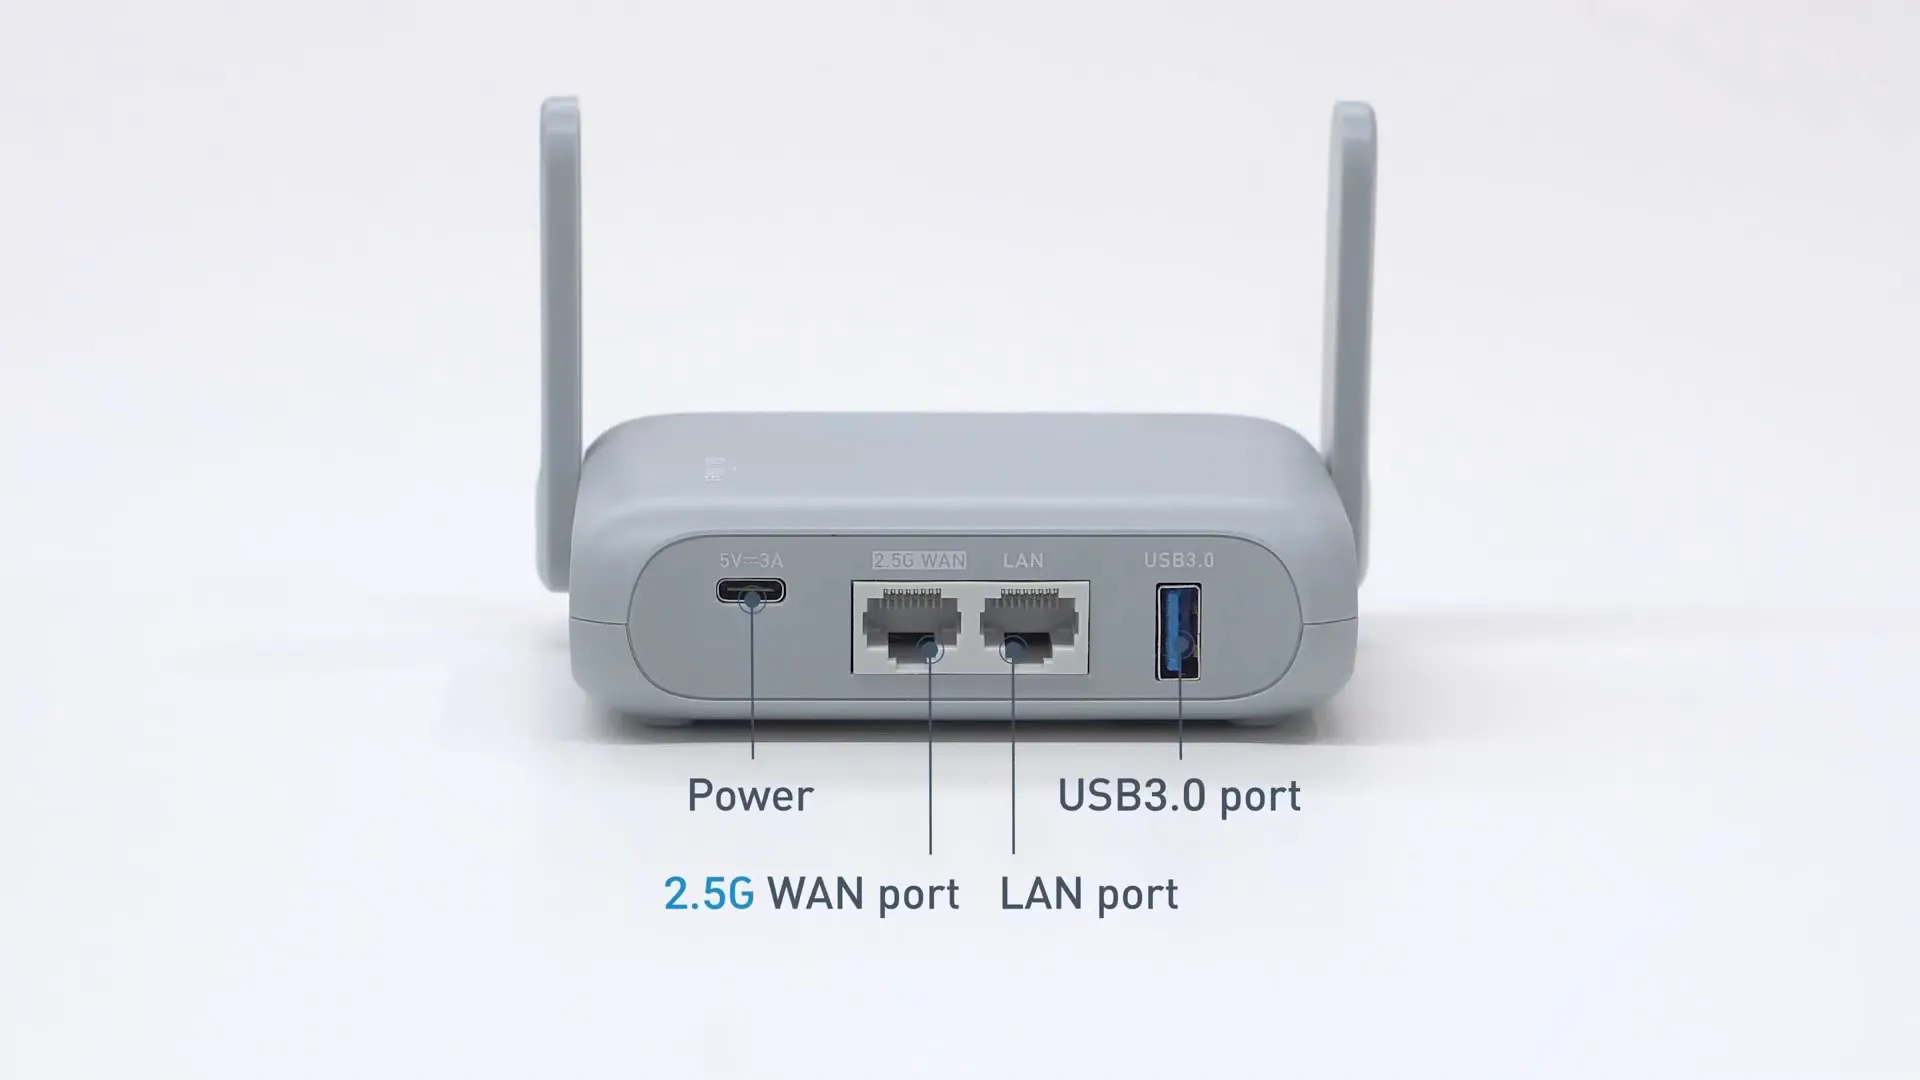
Why Choose the GL.iNet Beryl AX? The GL.iNet Beryl AX is a compact travel router packed with features designed to cater to your travel needs. It offers multiple WAN options, including ethernet, wireless repeater, LTE modem, and smartphone tethering. With its OpenWRT base OS, the router offers robust functionality such as AdGuard Home, USB 3 for network attached storage, and both VPN client and server capabilities. At an approximate MSRP of $120, it’s a steal for the convenience and security it provides.

Convenience and Security (The Dual Benefits): When traveling, especially with family, managing multiple devices can be a hassle. The Beryl AX simplifies this by allowing all devices to connect to a single SSID. It’s particularly useful in scenarios like campgrounds with device limits or on flights, where you can share one internet connection across several devices. Moreover, it ensures that your devices are on a separate LAN, enhancing privacy and reducing the risks associated with public Wi-Fi.
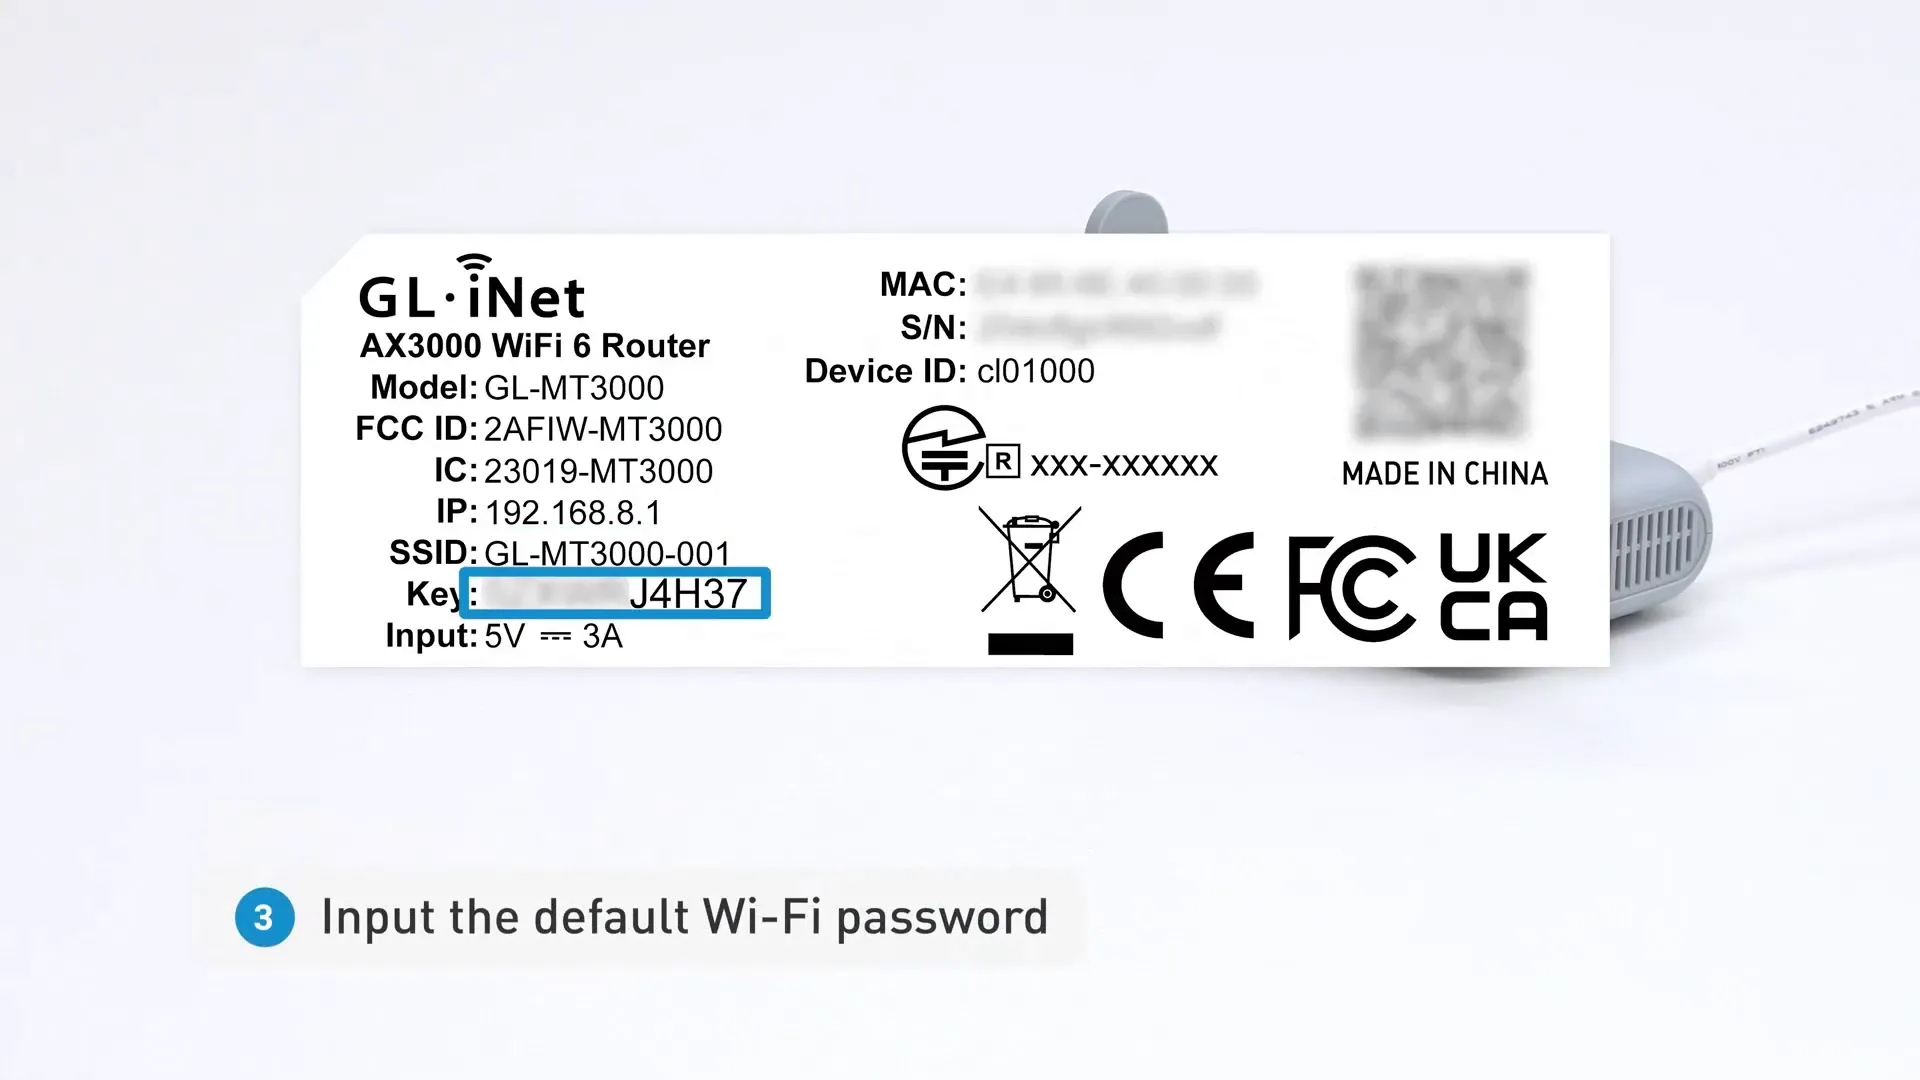
Setting Up Your GL.iNet Beryl AX: Setting up the Beryl AX is straightforward. First plug in power, then connect to the default wireless SSID of the router. It should be something like GL-[model]-5G (for the 5GHz network). The default password for the default SSID can be found on the label on the bottom of the Beryl AX.
After connecting to its Wi-Fi, you’ll access the router’s dashboard through your browser by opening up 192.168.8.1. On the main page, you’ll see various Internet connectivity options such as Ethernet, Repeater, Tethering, and Cellular.
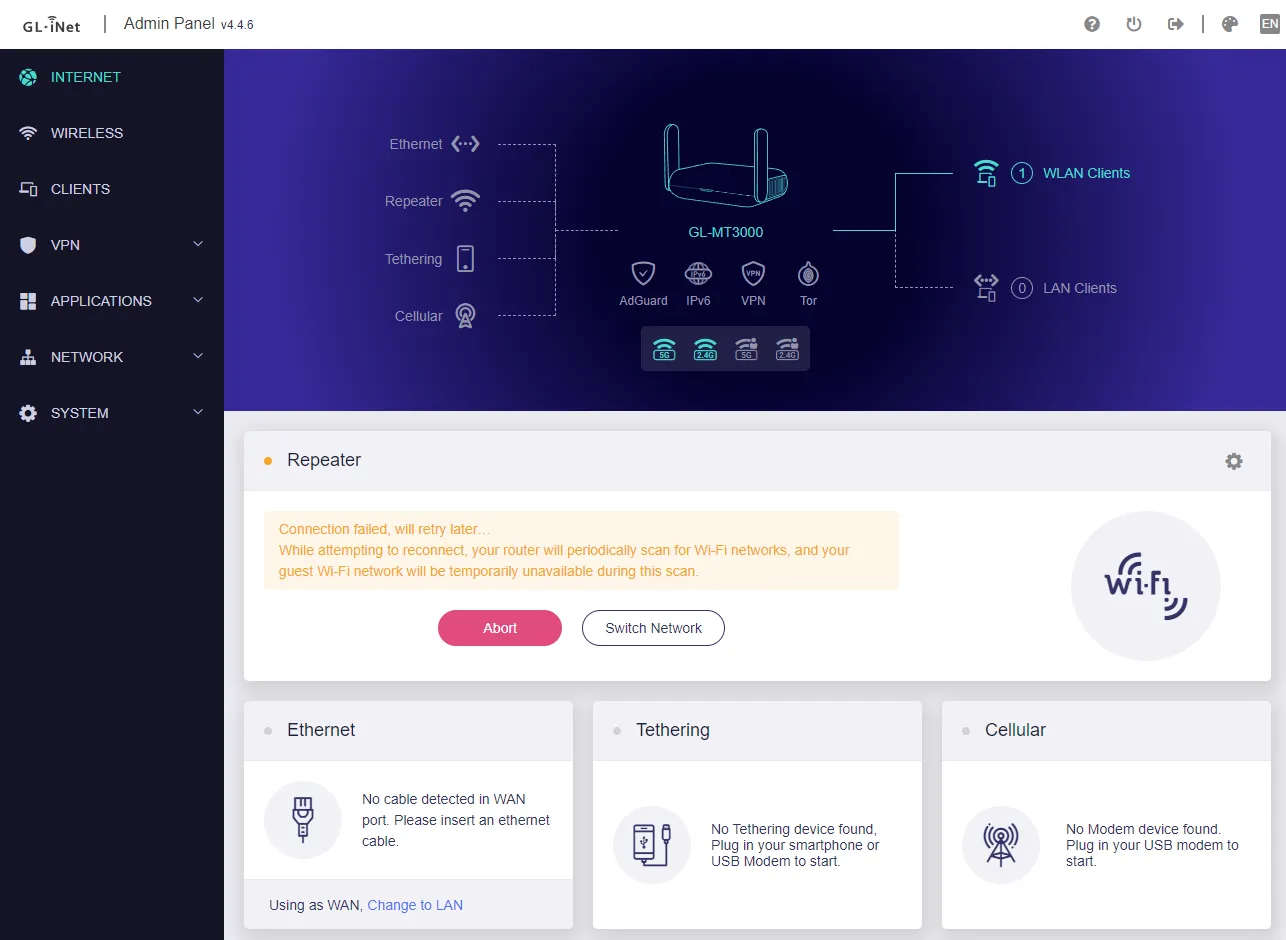
If you’re staying in a hotel room, the Ethernet option is my favorite, that is, if you can find an Ethernet connection…some hotel rooms don’t have them at all, and other hotels have them hidden…sometimes on the back of the television. The advantage to Ethernet is that the Internet connection is more solid, you’re not having to use wireless bandwidth to repeat the hotel’s Wi-Fi connection, and they’re typically not a captive portal to bypass.
If you can’t find Ethernet, the 2nd best choice is Repeater. If you click ‘Connect,’ the Beryl AX will search for wireless networks to connect to.
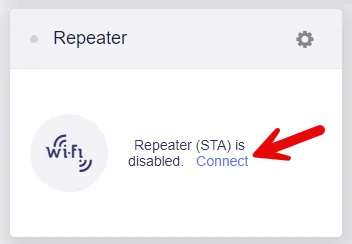
Select the hotel’s wireless SSID and then click ‘Connect.’ The Beryl AX will connect to that wireless network…if it is password protected only, you simply have to enter in the password.
If however there is a captive portal, you now need to connect to that network with your laptop (or whichever device you have connected to the Beryl AX’s wireless SSID) and you should be presented with the captive portal. Get through the captive portal, and the Beryl AX will now be functioning as a wireless repeater.
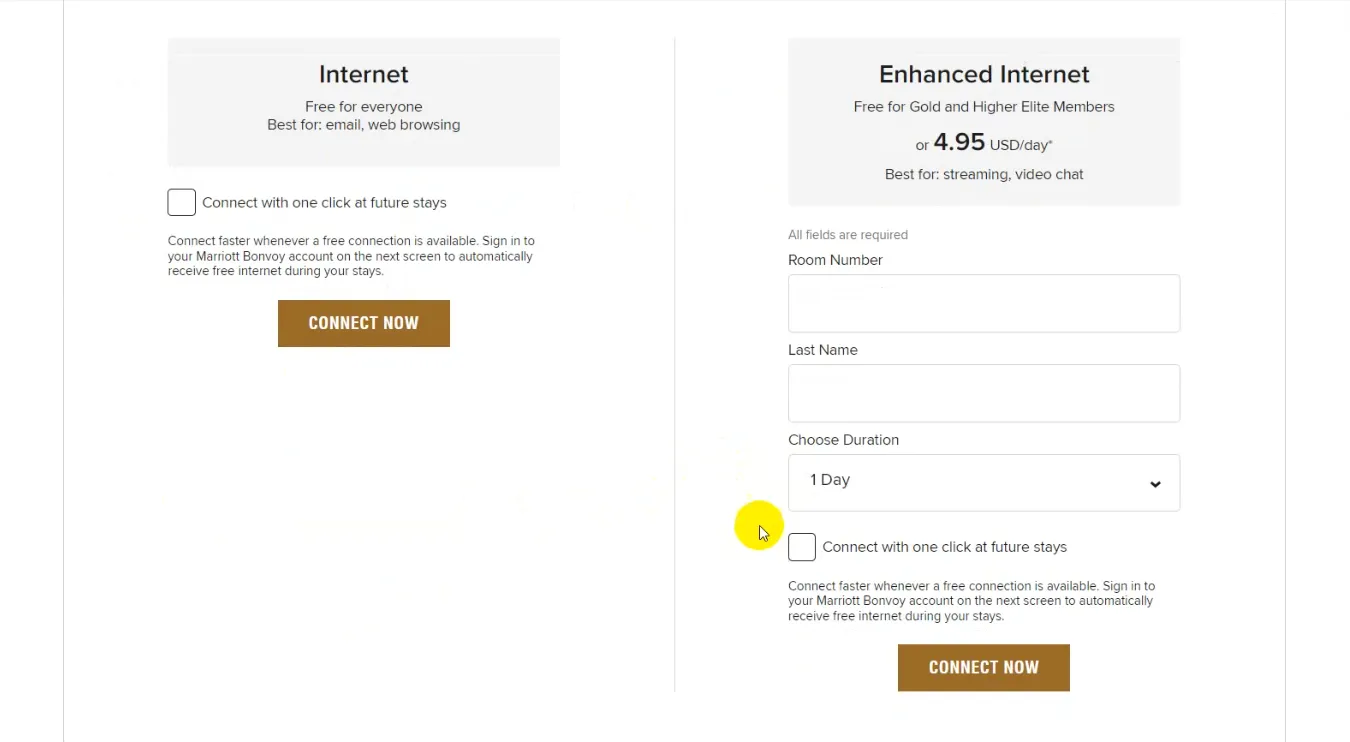
Captive Portal for a Courtyard by Marriott hotel.
Once you’re connected, you can optionally change the default wireless SSID’s by choosing Wireless in the left-hand menu.
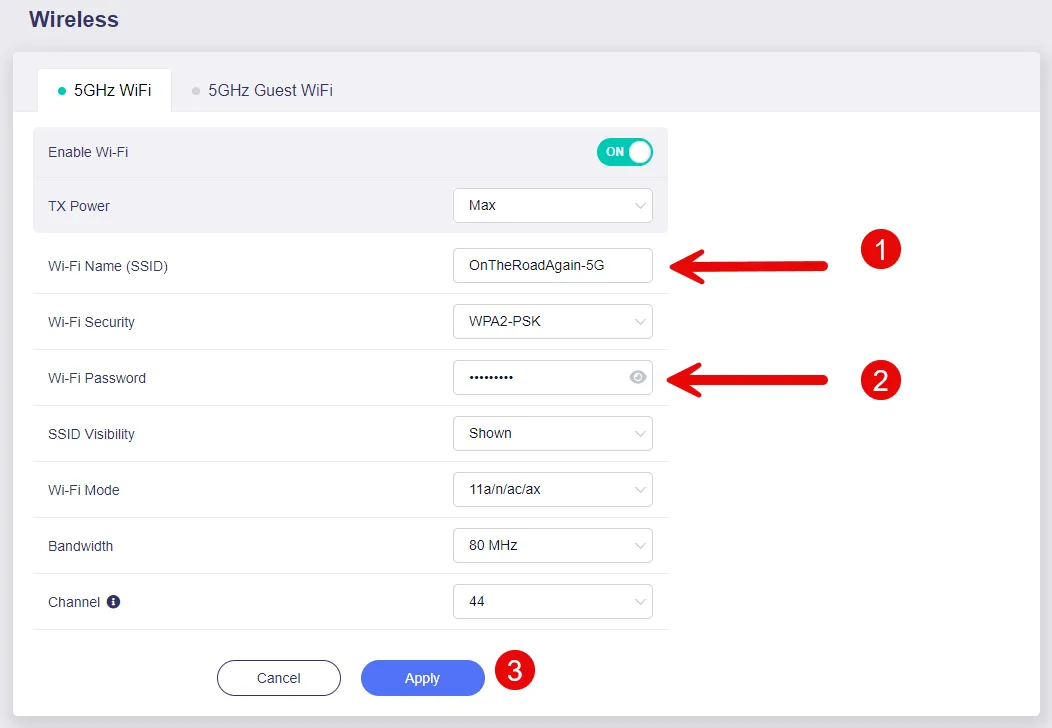
Click ‘Modify’ on the SSID. Then give your SSID a new name and password and click ‘Apply.’ You’ll have to repeat this process separately for the 5GHz and 2.4GHz networks. Notice also that you can enable a guest network here if you want.
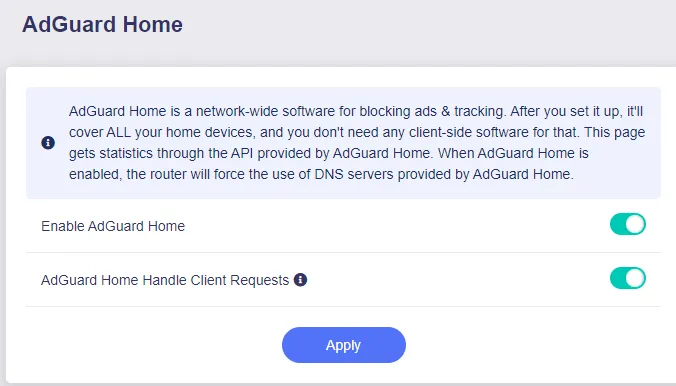
There are a TON of features to explore with the Beryl AX. One of my favorites is enabling the built-in Adguard Home server which you can get to by going to Applications > Adguard Home.
If you’re looking to use a VPN proxy service such as Private Internet Access, you can create that connection directly in the router by going to VPN > OpenVPN Client. Add a new VPN service provider, and you’ll be prompted to upload an OpenVPN configuration file. This can be generated by logging into Private Internet Access and navigating to Downloads > OpenVPN Configuration Generator > Go to OpenVPN Configuration Generator.
In the OpenVPN Configuration Generator, choose:
OpenVPN Version: OpenVPN 2.4 or newer
Select Platform: Linux
Select Region: (whichever you want)
Select Port: (take the default)
Click ‘Generate,’ and your file will be downloaded to your computer. Then upload it to the Beryl AX OpenVPN client page, enter your Private Internet Access username and password, and Save.
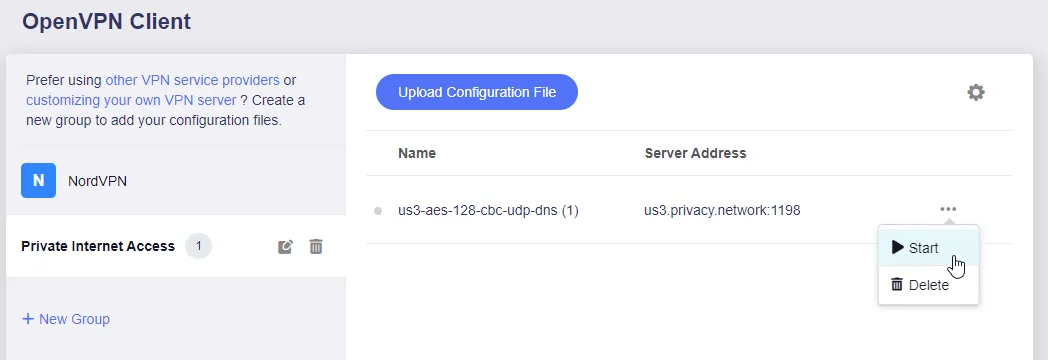
You can start the VPN proxy service by selecting the 3 dots next to your connection and choosing ‘Start.’
I like to tie the OpenVPN connection to the physical button on the side of the Beryl AX.
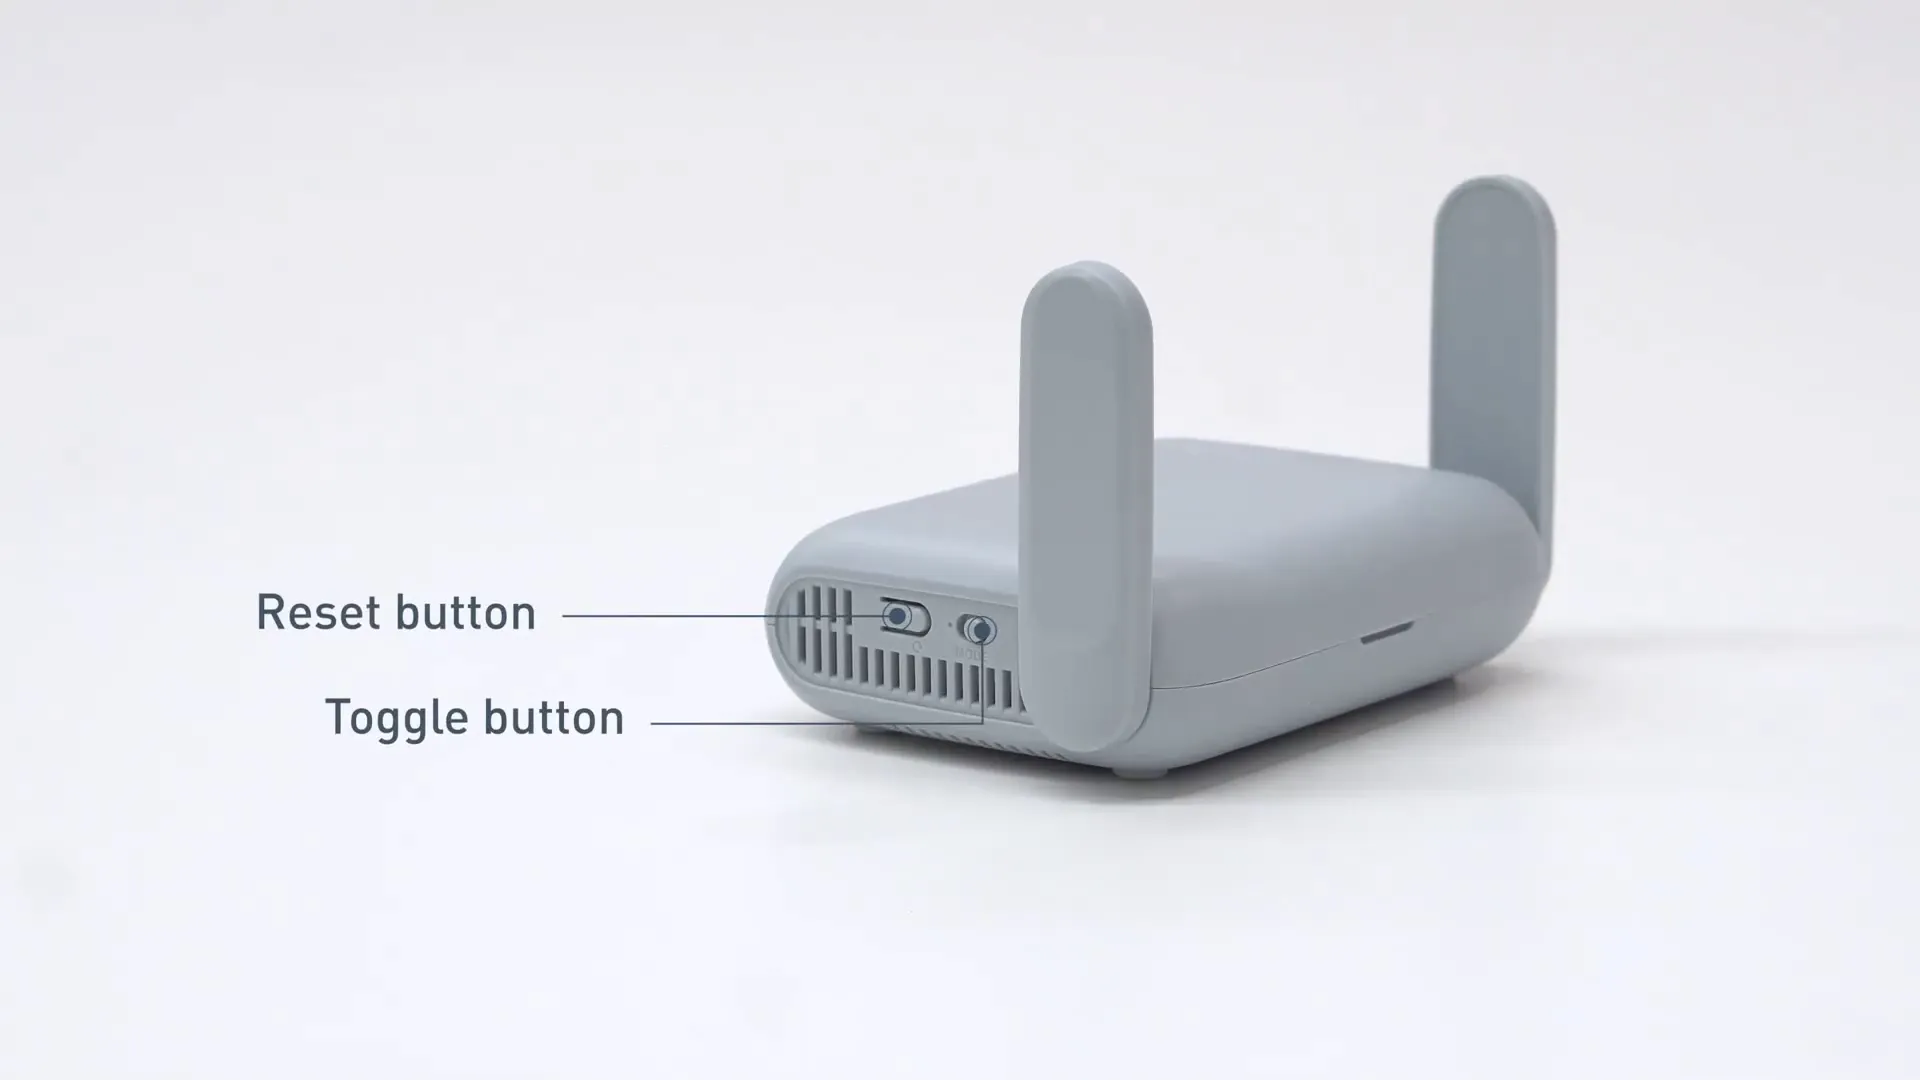
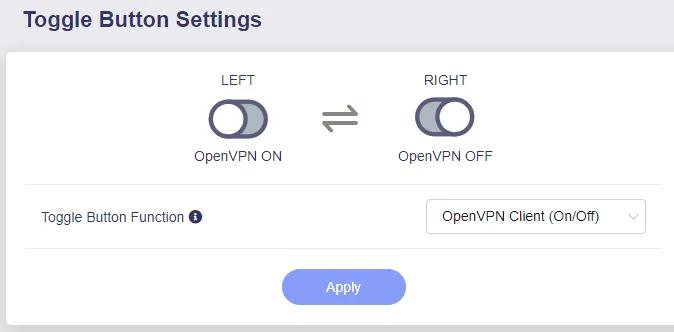
To do this, navigate to System > Toggle Button Settings, and set the ‘Toggle Button Function’ to OpenVPN Client (On/Off). Click Apply, and you can now enable and disable your Private Internet Access connection at the flick of a switch.
Final Thoughts: The GL.iNet Beryl AX travel router is an invaluable tool for anyone who travels frequently or requires a reliable internet connection on the go. It’s not just about convenience; it’s about ensuring a secure and private connection no matter where you are.