In my previous blog post HERE, we set up a Jitsi server on Vultr from start to finish. This post is going to build on that previous post and add some basic authentication to the server.
At the end of the last post, our server had no authentication: anyone who knows the URL can connect and start a video conferencing session.
Now we’re going to set up Jitsi so that you have to have a username and password to start a Jitsi conference, but you can then share that link with anyone, and all other attendees can join anonymously. This is the best way to run Jitsi: you know that your server won’t be running unauthorized video conferencing sessions, but you can still invite whomever you want, and your invitees don’t have to have an account on your Jitsi server (though you should still password protect your video conferences).
Before we get started, if you find this guide helpful, you can always:
PRO TIP: If you are following along with this post after you already set up Jitsi from my previous post, I would recommend taking a snapshot of your Vultr or Digital Ocean server at this point. That way, if you mess up your server going through these next steps, you can revert to the snapshot and not have to start the entire project over from scratch!
Prosody is the name of the Jitsi component that handles authentication. The first thing we need to do is enable authentication on our main domain. For our example, our main domain was jitsi.crosstalksolutions.com. These changes have to be made in the /etc/prosody/conf.avail/[your-hostname].cfg.lua file. So, for our example, we want to edit:
sudo nano -w /etc/prosody/conf.avail/jitsi.crosstalksolutions.com.cfg.luaFind the line that says ‘VirtualHost “[your-hostname].” Underneath that line you’ll see another line that says:
authentication = "anonymous"Change that line to:
authentication = "internal_plain"
This disables the anonymous authentication for the ‘main’ server host URL. However, we also need to create a new virtual host for our anonymous guests in order to facilitate their anonymous connections. Scroll to the bottom of the file and add these lines to create the new virtual host with the anonymous login method (use your own FQDN):
VirtualHost "guest.jitsi.crosstalksolutions.com"
    authentication = "anonymous"
    c2s_require_encryption = false
*** NOTE: The VirtualHost that we just created (guest.jitsi.crosstalksolutions.com) is only used for Jitsi internally, so there is no need to create a separate DNS A record for that FQDN.
CTRL+X followed by Y+ENTER to save and exit.
Next we need to configure our newly created VirtualHost / anonymous domain in our config.js file:
sudo nano -w /etc/jitsi/meet/jitsi.crosstalksolutions.com-config.jsUnder the ‘var config = [‘ section (right near the top of the file), you should already see a line that says domain: ‘jitsi.crosstalksolutions.com’, (it’ll say your FQDN, not mine). Just below that line, after the comment, you should see a line that is commented out that starts with ‘anonymousdomain.’ Uncomment that line and add your FQDN with a ‘guest.’ in front of it like this:
anonymousdomain: 'guest.jitsi.crosstalksolutions.com',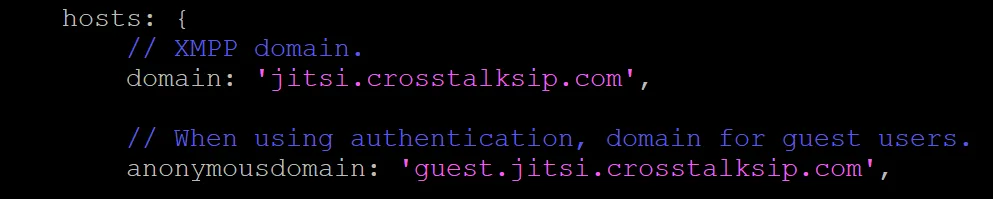
CTRL+X followed by Y+ENTER to save and exit.
Next, we need to tell the Jicofo service to only allow requests from our ‘authenticated’ domain.
sudo nano -w /etc/jitsi/jicofo/sip-communicator.propertiesAdd a new line at the bottom of this file:
org.jitsi.jicofo.auth.URL=XMPP:jitsi.crosstalksolutions.comAgain, substitute your own FQDN for jitsi.crosstalksolutions.com.

CTRL+X followed by Y+ENTER to save and exit.
Now let’s restart our Jitsi services:
sudo systemctl restart prosody
sudo systemctl restart jicofo
sudo systemctl restart jitsi-videobridge2
OK, this is great…we now have authentication…but we’re forgetting something: users!
To add users who can create video conferences in Jitsi, run the following command:
prosodyctl register <username> jitsi.crosstalksolutions.com <password>So, to create user ‘john’ with password ‘12345’ you would run:
sudo prosodyctl register john jitsi.crosstalksolutions.com 12345Use your own FQDN instead of jitsi.crosstalksolutions.com, and also use nice STRONG passwords for your users.
That’s it! Now to test it out: if you log onto your Jitsi server (https://jitsi.crosstalksolutions.com) and start a new meeting, you will told that the conference is waiting for the host, and you have a button to indicate that YOU are the host. Click that button.
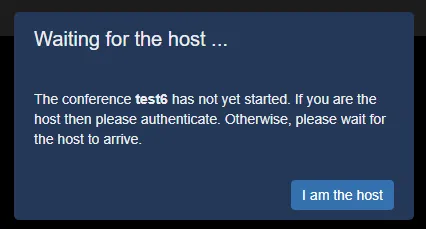
When prompted, enter in the username and password that you created with the prosodyctl command.
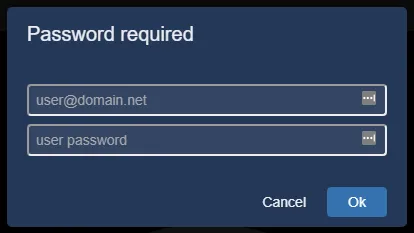
*** NOTE: If you created user ‘john’ your username here can be either ‘john’ or ‘john@jitsi.crosstalksolutions.com’; either one will work fine.
Your video conference has now started! At this point, you can share your video conference link with other folks (recommended to add a password to your conference) and then they can join up without having to have a Prosody user created for them.
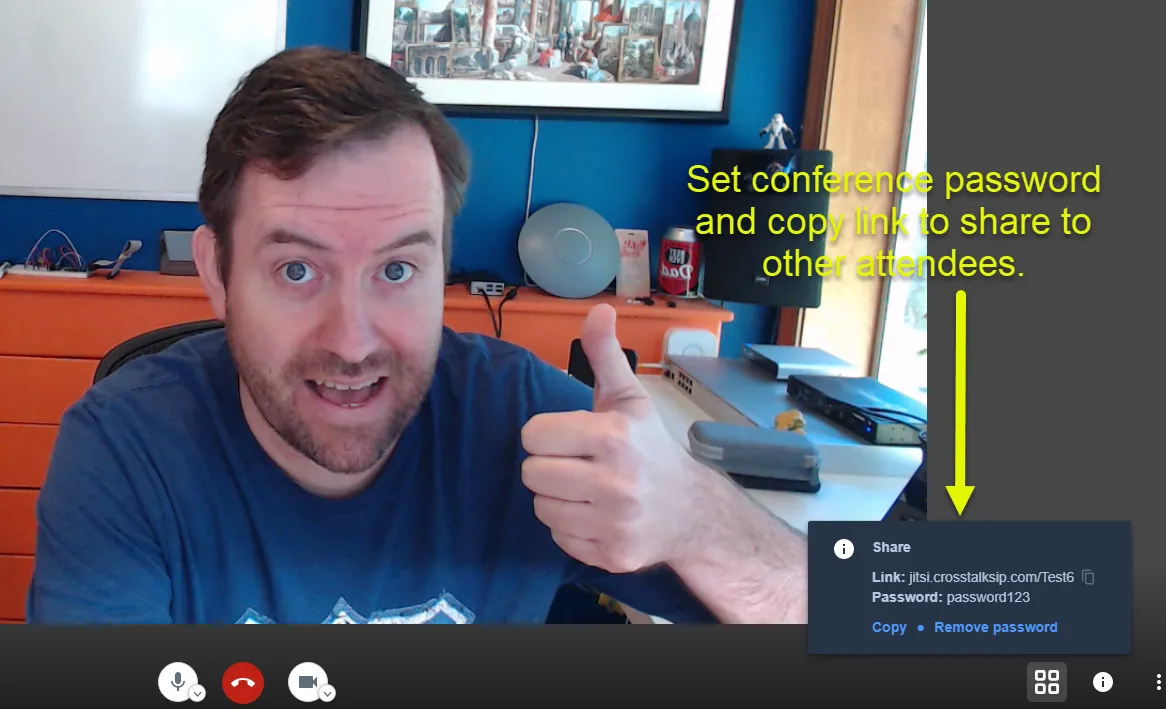
Click the ‘i’ in the bottom-right hand corner to set a conference password and to copy the link that you can share to other attendees.
If you enjoyed this post you can always: